Week 4
Finish and Publish
Part of Make Your First Mini-Game.
We turn the project into a real, finished game: a title screen to start, a victory screen when the last enemy is cleared, and music. Then your learner publishes it to the web and gets a link the whole family can play.
Class file
Joining mid-course or catching up?
Download this week's starter project so your learner can jump straight into this class, instead of carrying their previous file forward. Enrolled students get the password in their Outschool welcome message.
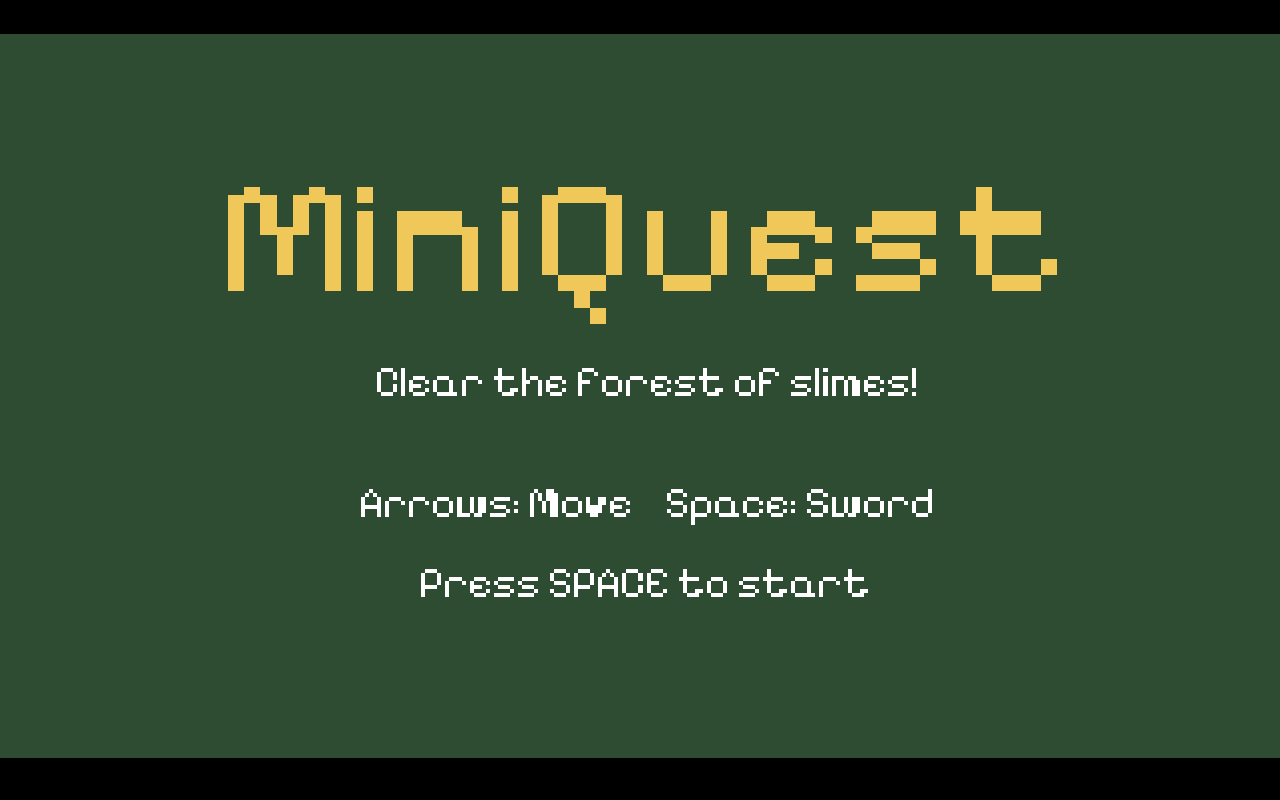
What this class covers
- A title screen
- Your learner builds a title screen so the game has a real front door: it boots here, shows the controls, and waits for a press of Space to start the adventure.
- A winning moment
- Clearing the very last slime brings up a victory screen, a satisfying finish to the adventure, with a press of R to play again.
- Music and sound
- A looping soundtrack plays under the game and a little jingle rings out on the win screen, giving the finished game its mood.
- Publishing online
- Your learner exports the game to the web and publishes it to a private link the whole family can open and play.
A look inside the class
Optional Customizations
Just-for-fun customizations to try on your own between classes. Never needed to keep up.
- Add a swipe sound when you swing your sword.
A fresh sword is created every time you press Space, so a sound in its Create event plays on each swing. Open obj_sword's Create event - right now it looks like this:
image_speed = 1; // play the swing once alarm[0] = 10; // vanish after 10 frames (~1/6 second)Add one line at the bottom so it plays a swipe:
image_speed = 1; // play the swing once alarm[0] = 10; // vanish after 10 frames (~1/6 second) audio_play_sound(snd_slash_1, 1, false); // swipe sound on each swing - Add a hit sound when a slime is bopped.
Open obj_sword's Collision event with obj_enemy_slime (the one you built in Class 3). Right now it looks like this:
// The swing touched the slime - bopped! with (other) { instance_destroy(); // 'other' = the slime }Add one line at the top so a bop makes a sound:
// The swing touched the slime - bopped! audio_play_sound(snd_hit_3, 1, false); // hit sound when a slime is bopped with (other) { instance_destroy(); // 'other' = the slime } - Add a click sound when you restart.
Make pressing R on the win screen click. Open obj_win's Step event - it looks like this:
// Press R to go back to the title and play again. if (keyboard_check_pressed(ord("R"))) { room_goto(rm_title); }Add the sound just before the room_goto line:
// Press R to go back to the title and play again. if (keyboard_check_pressed(ord("R"))) { audio_play_sound(snd_menu_accept_1, 1, false); // click sound on restart room_goto(rm_title); }These three sounds are all the same one-liner - audio_play_sound(sound, 1, false). Swap in any sound from the Sounds folder to make it your own!
- Publish your game online for your family to play.
This is the big one - put your finished game on the internet! First, sign in to GameMaker: in the top-right corner, click the account button and sign in with a free Opera account. The IDE reloads when you sign in, so wait for it to come back.
Click the Target button (top-right) and choose GX.games.
Click the gear icon at the top to open Game Options, then the GX.games section. Make sure New Game is selected and give it a unique Game Name (if the name is taken, add a few numbers). Then, in the Graphics section, uncheck "Interpolate colours between pixels" - without this, your pixel art comes out blurry in the browser.
Click Create Executable (the down-arrow-into-a-box icon at the top) and choose Upload as Game. A GX.Games Packaging window opens and compiles and uploads your game; when it finishes it shows "GXC Upload succeeded." Click Edit Game on Opera at the bottom of that window to open your game's page (GX Dev) in your browser.
GX Dev may open signed out - click Sign in (top-right). The first time, it asks you to create a username.
On the Games page, find your game's tile and click Manage game. In the left menu, open Publish & Updates, make sure the version is set to Unlisted, and click Copy link - that is your private link to share. Keep it Unlisted; don't click Publish on GX Games (that is the public listing - we keep student games private).
Open the link in a browser to play, then drop that private link in the Outschool classroom so everyone can play each other's games!